More Singapore businesses are moving off QuickBooks and ABSS (fka MYOB) to Xero right now because of IRAS’s GST InvoiceNow requirement — GST-registered businesses are being onboarded to e-invoicing in phases, and Xero is one of the accredited solutions that supports it. On top of that compliance push, Xero offers real-time bank feeds, easier GST reporting, and cloud access your whole team — and your accountant — can use at once. But moving years of financial data between systems isn’t a simple export-and-import job. Here’s what the process actually involves.
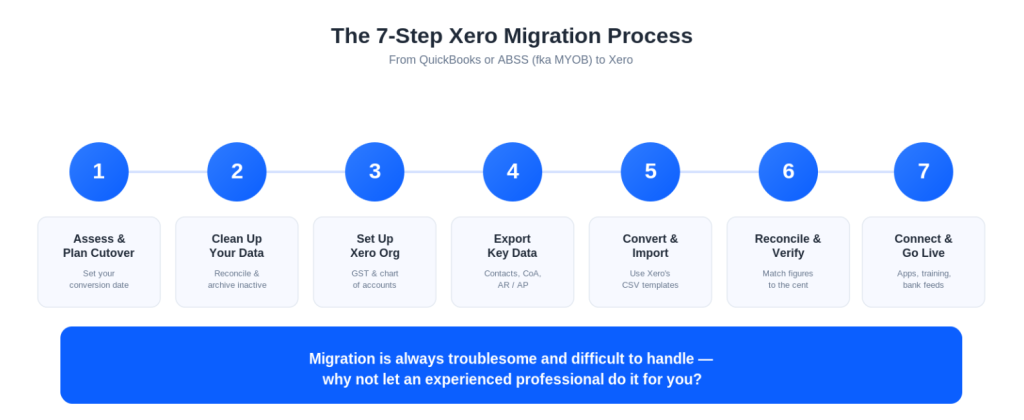
Step 1: Assess and plan your cutover
Start by reviewing your chart of accounts, tax codes, and any custom fields or reports you rely on. Decide your conversion date — ideally the start of a new month or your financial year — since Xero requires migrations to begin on the first day of a month.
Step 2: Clean up your existing data
Reconcile all bank and credit card accounts up to the cutover date, clear suspense items, and archive inactive customers, suppliers, and unused ledger codes. Messy data in QuickBooks or ABSS becomes messy data in Xero — this is the step most businesses underestimate.
Step 3: Set up your new Xero organisation
Configure company details, financial year-end, base currency, and Singapore GST settings before any data moves across. Getting the chart of accounts and tax rates right at this stage saves significant rework later.
Step 4: Export data from QuickBooks or ABSS
The crucial data to pull out are your contact list, chart of accounts, and outstanding accounts receivable and accounts payable — these are what your new Xero file needs to open for business on day one. How much historical data (one year, two years, or more) you also bring across is a separate decision, and it depends on your needs: the more history you migrate, the more work is involved, and the more the migration will cost.
Step 5: Convert and import into Xero
Data can be mapped and uploaded via CSV, or migrated using a specialist conversion tool. If you’re importing via CSV, use Xero’s own CSV templates — downloadable from Xero’s website for contacts, chart of accounts, invoices, and bills — rather than a freeform export from your old system. Xero’s import will reject or misread files that don’t follow its column structure, which is one of the most common causes of failed or incomplete migrations.
Step 6: Reconcile and verify
Run a Trial Balance and AR/AP Aging Summary in both the old system and Xero for the same date. Every figure should match to the cent before you consider the migration complete.
Step 7: Connect apps, train your team, and go live
Reconnect bank feeds, reinstate integrations (payroll, inventory, POS), and walk your team through the new workflows before you fully retire the old system.
Why most businesses don't do this themselves
On paper, this looks like seven straightforward steps. In practice, each one carries decisions that affect your reporting accuracy for years afterwards — how tax codes map across systems, how partially paid invoices carry over, how payroll history reconciles with IRAS submissions. A migration that should take days can stretch into weeks when it’s squeezed between someone’s other job responsibilities, and errors discovered after go-live are far more costly to fix than errors caught before.
That’s why we recommend engaging a certified Xero migration specialist rather than DIY-ing the switch. It’s a time-consuming, detail-heavy process, and getting it wrong affects your books long after the migration is “done.”
Let the professionals handle your migration
361 Degree Consultancy has successfully set up Xero for more than 2,000 businesses across Singapore and Malaysia, and we specialise in migrating businesses from QuickBooks and ABSS to Xero. We handle the data mapping, GST configuration, payroll conversion, and reconciliation — so your books stay accurate and your team stays focused on the business, not spreadsheets.
Contact us today at 6515 7906 or enquiry@361dc.com to prepare your migration.