Guide to Set Up InvoiceNow for Xero

This step-by-step guide will set up InvoiceNow in Xero. Once completed, you will be part of the InvoiceNow (PEPPOL) network in Singapore and your sales invoices will automatically flow into your customer’s accounting software without the need of data entry (if the company is also using a PEPPOL ready software).

Step 1

Visit the Invoici site (https://connect.invoi.ci/signup/integrate) and navigate to the integration page. Click Connect to Xero.

Step 2

Select your Xero organisation and click Allow Access.

Step 3

Invoici collects organisational information from your Xero organisation. Review this information and ensure that a unique company identifier is entered in the appropriate field. This should be your organisation’s UEN (Unique Entity Number).

Step 4

Once you are happy that the information is correct, tick the checkboxes and click Confirm Details.

Step 5

Proceed to click on the blue button and scan the QR code with your Singpass.

Step 6

Once successful, you should receive the following information.

Sending Invoices on the Peppol Network

Step 1

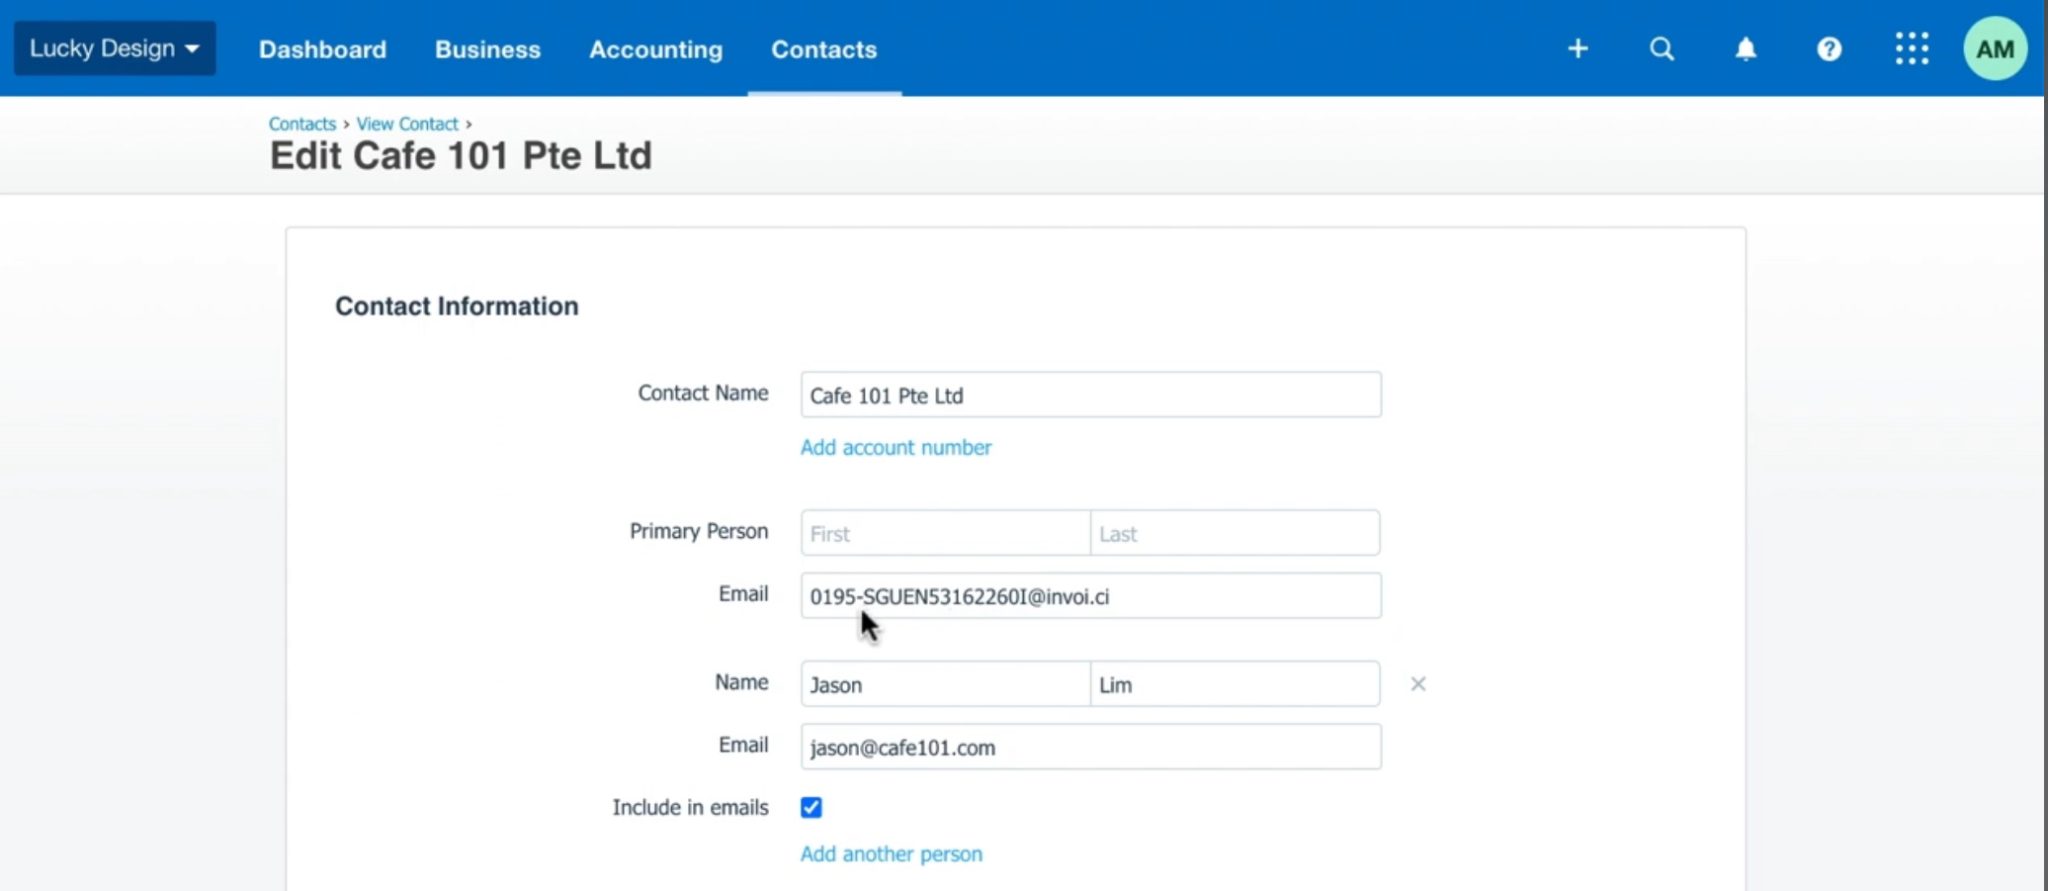
When you are ready to send an invoice to your customer(s), select the email option and enter your contact’s InvoiceNow email address. This is a unique @invoi.ci address that contains your organisation’s UEN, eg. 0195-SGUEN12345678D@invoi.ci where 12345678D is the UEN. Tip:  Add your contact’s InvoiceNow email address to the contact record in Xero. If an email already exists, select Add another person and enter the email as a secondary address and check the box Include in emails.

Step 2

All invoices sent via the InvoiceNow network will show a confirmation message along with a unique transmission ID in the History & Notes section.

Receiving Invoices on the Peppol Network

If you receive a bill (an invoice from your supplier) via the InvoiceNow network, the bill will be created in a draft status. Review the bill, assign an appropriate chart of account code (eg. Sales) and tax rate, and approve.